

Behold a beautiful glass ornament with delicate, marbled threads of silver. Is it a precious and costly adornment that can be found only in the finest stores? Or...
an easy and inexpensive craft project even kids can help with

The Annual Christmas Ornament is a longstanding tradition in our family. Every year, back when our kids were young, they would craft special ornaments to give away as Christmas gifts to every person who gave a gift to them. Every year we chose a different project -- from origami to baked clay to painted wood -- and it was always a fun thing for our family to do together. More importantly, it was a great way to teach our children the joy of giving.
I hope this is something you will try with your young ones. To get you started, let me show you how easy it is to make these lovely silvered-glass ornaments. Some steps of this project can be done by young children with your adult supervision, so do get the kids involved.
It takes just a few easy-to-find supplies:
- clear glass bulb ornaments
- Krylon silver looking glass spray paint
- acrylic paints (black, navy and white work best, but try any color you like)
- an empty egg carton
- some newspaper to cover your work area
First remove the hanger caps off the ornaments and put them aside. Set out your egg carton, and then get started with the fun stuff.

Have a grownup spray a small amount of the Krylon looking glass paint inside an ornament. Begin swirling to spread the paint in uneven streaks. Let a little of the paint drip out into the egg carton, and then swirl again. Repeat this process until the inside of your ornament is criss-crossed with silver "marble" veins. Set the ornament upside down in the egg carton and allow the excess paint to drip out and the inside to dry thoroughly for a day or two.
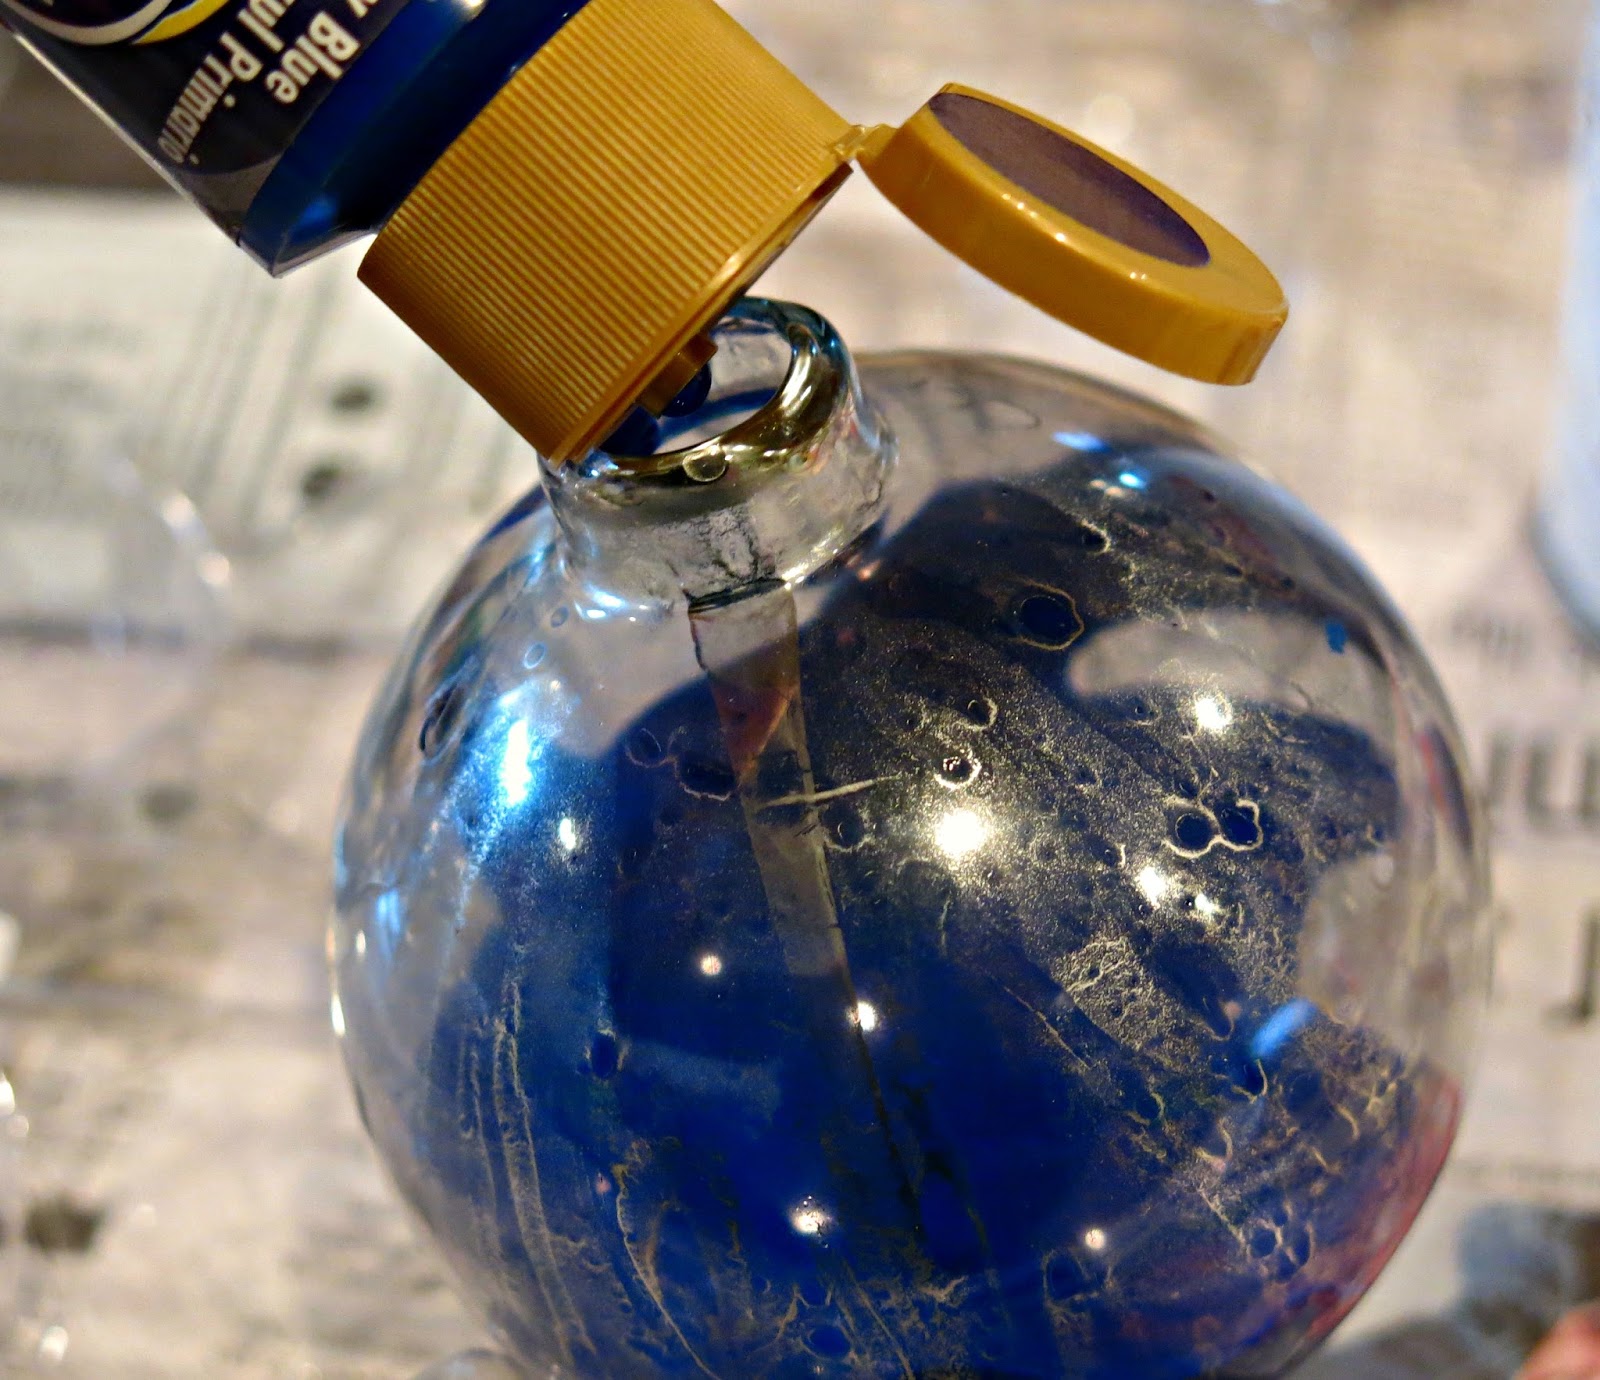
In the next phase, start by pouring just a teaspoon or two of acrylic craft paint into each ornament, and slowly rotate them to spread the paint thinly.
*** This is a fun step that your kids may be able to help you with. Supervise them to
make sure they don't drop, squeeze or break the ornaments, or let the paint drip out. ***

As the craft paint spreads over the dried mirror paint inside the ornament, it will create a beautiful "marbling" effect. Once the paint has covered the entire inside of the bulb, set the ornaments back in the egg carton, open-end-down, to let the excess paint drip out and the remaining paint dry on the inside.

Wait another day or two, then wipe or trim any excess dried paint from the mouth of the ornament, and replace the hanging cap.

These make great gifts for teachers, grandparents, neighbors, troop leaders, coaches, dance instructors, babysitters... you'll want some, too, so make lots! And have lots of fun doing it.
I really love how these turned out!
ReplyDeleteThanks for joining Cooking and Crafting with J & J!
Thanks! I hope you give them a try.
DeleteI love them! I'm sure my kids will just want to make some of these ornaments! If you have time I would love for you share these over at the Holidays Celebration link party that just went live today! (http://keepingitrreal.blogspot.com.es/2015/11/holidays-celebration-link-party-1-is.html)
ReplyDeleteWill do!
DeleteThese are beautiful, I love diy ornaments! Pinning :)
ReplyDeleteAnd I love getting pinned! Thank you so much!
DeleteThese are so pretty. I use to do these in class with my students for their parent gift. I love how they turn out. I'm having a theme on traditions next week on Tuesday Talk and will be featuring your post on my blog. Also, I began following you on Instagram. Great job. See you next week!
ReplyDeleteThanks, Michelle! I'm looking forward to next Tuesday.
DeleteYou did a beautiful job making these pretty ornaments.
ReplyDeleteThanks for sharing this craft with us at Cooking and Crafting with J & J.
Thank you, Julie. It was fun.
DeleteThese are so gorgeous! That's such a neat look. Thanks for sharing with the Wednesday Showcase!
ReplyDeleteThanks! They are way too pretty for so little work! See you next Wednesday.
DeleteGreat job, love how they turned out!
ReplyDeleteThank you, Cheryl! I'm glad you stopped by.
DeleteVery pretty!
ReplyDeleteThank you so much!!! The ornaments are nice, too, don't you think? :)
DeleteThese ornaments are so pretty. Thanks for the tutorial. Happy Thanksgiving, Linda
ReplyDeleteRight back at you, Linda! I hope your holidays are splendid.
DeleteBeautiful! I have never seen this technique before, so thank you for sharing it with us at Snickerdoodle Sunday!
ReplyDeletePinning and Tweeting! Have a wonderful Thanksgiving!
~Laurie
Thank you, Laurie! I love being pinned!
DeleteHow beautiful!! I would love to have you share at my new link party: http://craftymomsshare.blogspot.com/2015/11/make-your-own-zoo-crafty-weekends.html
ReplyDeleteIt would be my pleasure, Carrie!
DeleteHow beautiful! I can't believe this is a kid-made ornament!
ReplyDeleteCross my heart and hope to die... (Whoever came up with THAT expression as a way to say 'I'm not lying' was unfamiliar with term 'kid-friendly,' eh?)
DeleteThey turned out beautifully! I love the marbled look and they definitely would make a great present! Thanks for sharing this week at Share it Link Party!!!
ReplyDeleteThank you. That particular ornament has been designated for a certain kindergarten teacher we know...
DeleteOh this is beautiful!!! You are clever. I'd like to give this a try (hmmm, need to get a Christmas tree!!!!) . They would be a beautiful present, I agree.
ReplyDeleteVisiting from Creative Mondays!x
Well, first things first, Kezzie! But I do hope you give them a try some time. Thanks for dropping by!
DeleteThese look wonderful and really add value to basic ornaments #CreativeMondays
ReplyDeleteThanks! I still have some my kids made about twenty years ago, and they look as good as ever. One of the grandkids helped me with this one.
DeleteHow creative and beautiful! Thanks for sharing at My Flagstaff Home!
ReplyDeleteJennifer
My pleasure! Thank YOU for hosting such a great party. I look forward to it every Thursday night.
DeleteWhat a wonderful creative idea. I so want to try that, they are just beautiful. Thanks for bringing this lovely project to Fridays Blog Booster Party. Bring your posts next week and see our whole new format called Blogger's Pit Stop
ReplyDeleteKathleen
I'll be there, Kathleen. Thanks for stopping by!
DeleteThat is gorgeous Thank you for linking it up with us at SHARE IT 38 at FineCraftGuild.com A new party will open tomorrow afternoon so hope you'll be back with us again soon.
ReplyDeleteI wouldn't miss it, Rose. See you there!
DeleteBeautiful Christmas Balls :) Thank you so much for sharing
ReplyDeleteCongratulations, you are being featured in this week's
Snickerdoodle Mini Round Up!
Have an awesome day!
Joanita
Oh, that is great! Thank you so much!
DeleteAbsolutely beautiful! You are featured as a favorite at our Pinterest party~ Thank you for sharing!
ReplyDeleteHope to see you again this weekend!
http://redoityourselfinspirations.blogspot.com/2015/11/pinbellish-pinning-celebration-13.html
I'm so glad you came by, Robin, for 2 reasons: 1. I am THRILLED to be featured! 2. I lost track of your party before I could get it onto my "Link Up" page. It's there now. And I will see you at your party this week. So glad you stopped by!
Delete